 At Tech Benders we specialize in both Act and Zoho. And we understand that once you get your information into your CRM system, you may need to get it out again in the form of a report. The Act Report Writer has not changed in over 20 years. Although Act users can make simple edits to most of the existing reports, creating advanced Act Reports requires a very advanced knowledge of Visual Basic Scripting. Even then one of the restrictions of the Act Report Writer is that you can only make use of two tables per Act report. As an example, you can’t create a report that combines Contact, Note and Opportunity information into the same report.
One solution available to Act Users is to purchase third-party addon products. Another solution is to use an analytics product such as Crystal Reports. I have recently discovered that Zoho Analytics can also be used to create Act Reports. Here’s how you can create a connection between Act and Zoho Analytics:
In Act!
- Download and/or Install the Act! Reader
- You can also find the Actreader at C:\Program Files\ACT\Act for Windows\ActReader.exe
- Set and remember the password!
The ACT! Reader Utility is designed to allow read-only access to most of the data tables within an ACT! Database. This utility is designed to extract the Act Data out of Act for usage with third-party tools such as Zoho Analytics and Crystal Reports.
In ActDiag
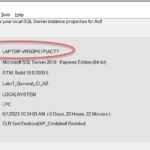
- In the Opening Screen note the Server Name
- Beginning string in front of the slash will be used for the Databridge name and Database Host Name
- Information after the slash will be used for the SQL Server Instance Name
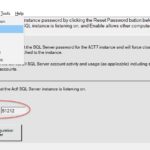
- Go to Server > Server Security and make note of the TCP/IP Port Number
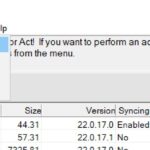
- Go to Databases > Database Details List and make note of the Exact Database Name
 |  |  |
In Analytics
- Go To analytics.zoho.com > Import Your Data > Category Databases > Local Databases
- You will be prompted to install the Zoho data bridge
Databridge is a small software that has to be downloaded and installed to connect SQL to Zoho.
 Once the databridge is installed go to Home\ Import Your Data > Category Databases > Local Databases and select MS SQL Server
 - You will be prompted to install the JDBC Jar for MS SQL Server
- Return to Home\ Import Your Data > Category Databases > Local Databases and select MS SQL Server
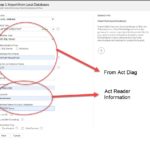
- Fill in the data using the information you gleaned from ActDiag and the credentials you setup in Act Reader
At this point you will have full access to all of Act’s tables and their fields. If you are unsure of the underlying Act structure you can access it HERE.
If you need additional help please reach out to us!


